
Adding the Class Filter
Adding the Class Filter to your website.
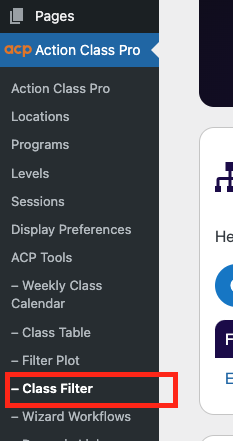
- First, navigate to Class Filter in the left hand vertical navigation.
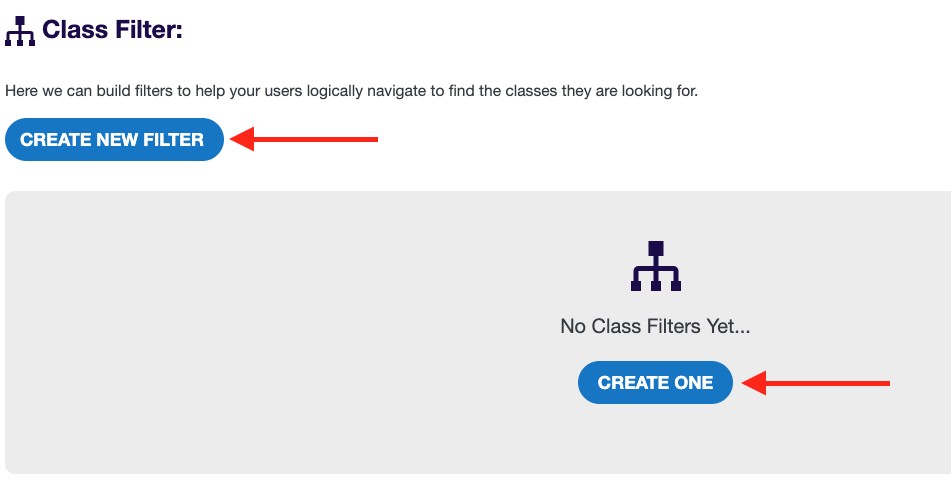
- Create a Filter. Once you are on this page you will click one of the options to start building a filter.
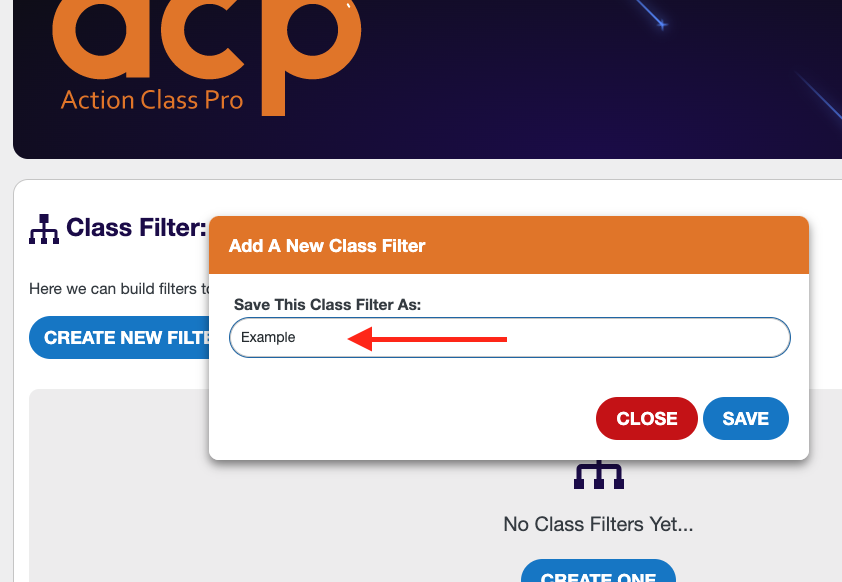
- Give your filter a name. Not like “Baxter” or anything. Just something to help you remember it. I’m going to name my filter “Example”, because I’m SO creative like that.
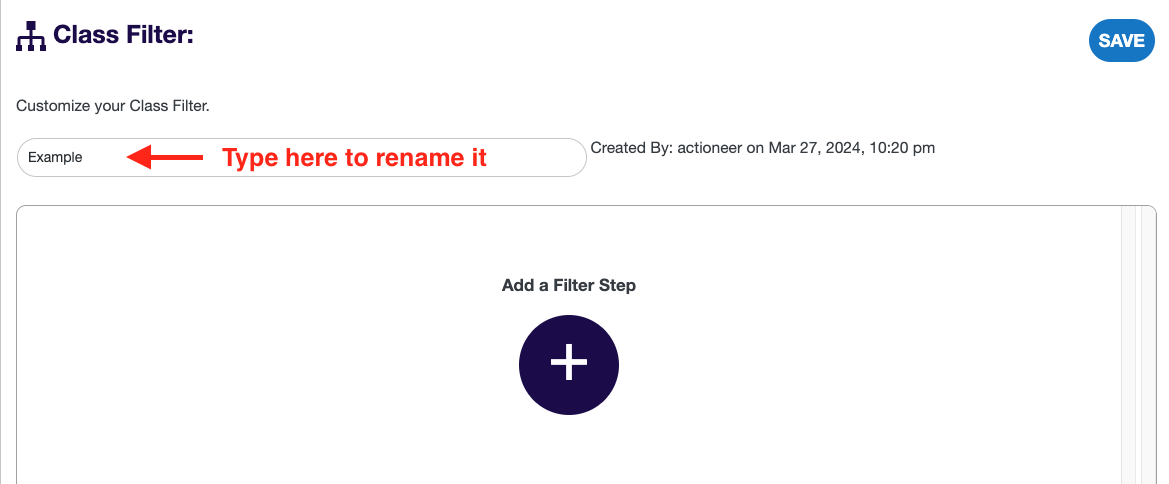
- After clicking “Save” you will be brought to a blank Filter Building Canvas.
- You can rename your filter anytime by typing in the canvas name field at the top.
- Start Building your Filter. You build a filter by adding “Filter Steps”. These steps are required information your users will click (or tap on mobile) in order to progress. By selecting these options they should get a custom list of classes defined by the options you specify. Here are the options available to you:
- Select Location
- Select Program
- Select Level
- Select Session
- Select Age

- After you add a Filter Step to your Filter, you can customize it to only show the options you want.
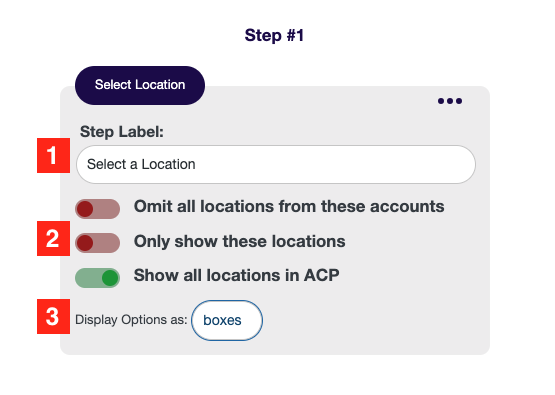
- Step Label – Change the step label to something you prefer. Maybe a different language. Or, maybe something that better fits your school.
- Define what options to Show – You may want to only include some options or only exclude some options. You decide.
- Display Style – You may want to only display some options as buttons and some as default iClassPro Boxes.
- Your Filter is Finished when you choose “Display Result”. After selecting this option you must click “Save” before trying to preview your filter.
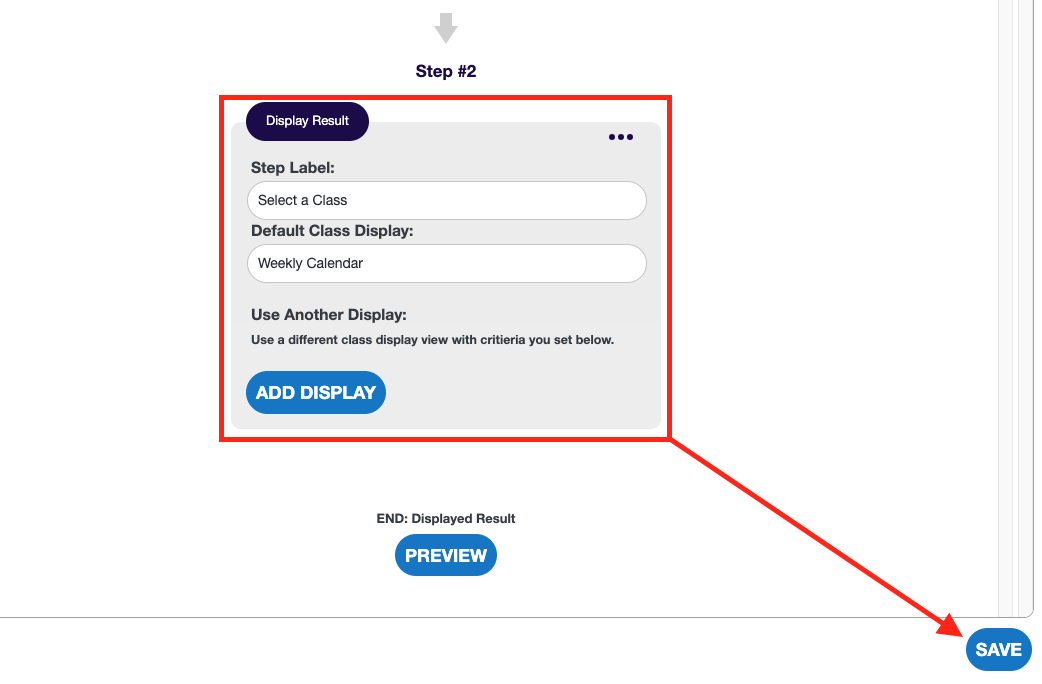
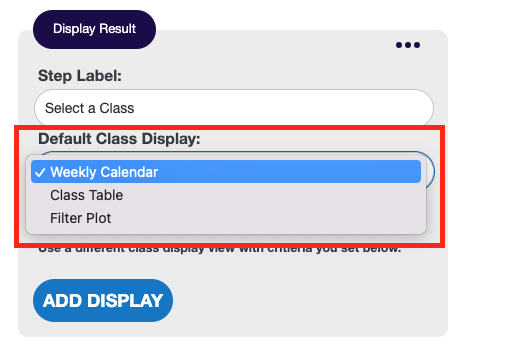
- Using different display types. Your filter will allow you to use different display types based on criteria you provide to it. Those display types are:
- Display Type criteria. You can choose the default display type by using the select menu under Default Class Display.
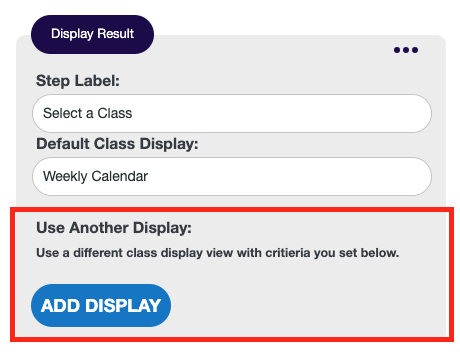
- Display Criteria – You can opt to use different displays if different options are selected when your users are utilizing your class filter. In order to do so, click “Add Display“.
- Defining Custom Display Criteria. You can define a set of criteria or a single one. It’s up to you.
- Here is an example of using just one piece of criteria.
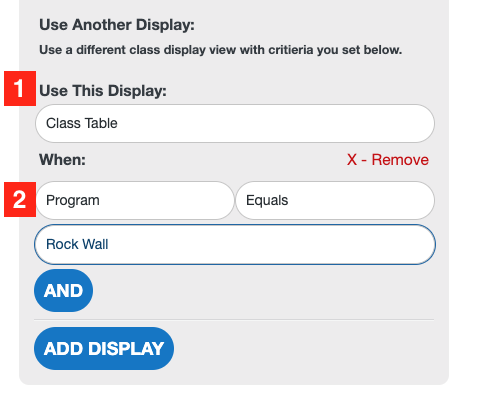
- Select the Display Type
- Select the Criteria
- Here is an example of using a set of criteria.
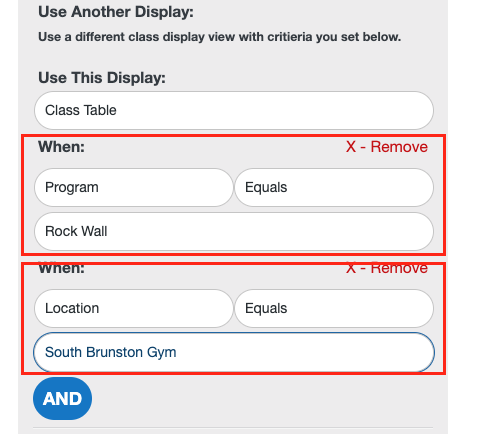
- To add another piece of criteria just click the “And” button
- Here is an example of using just one piece of criteria.
- Preview your class filter. But first, make sure you click “Save”

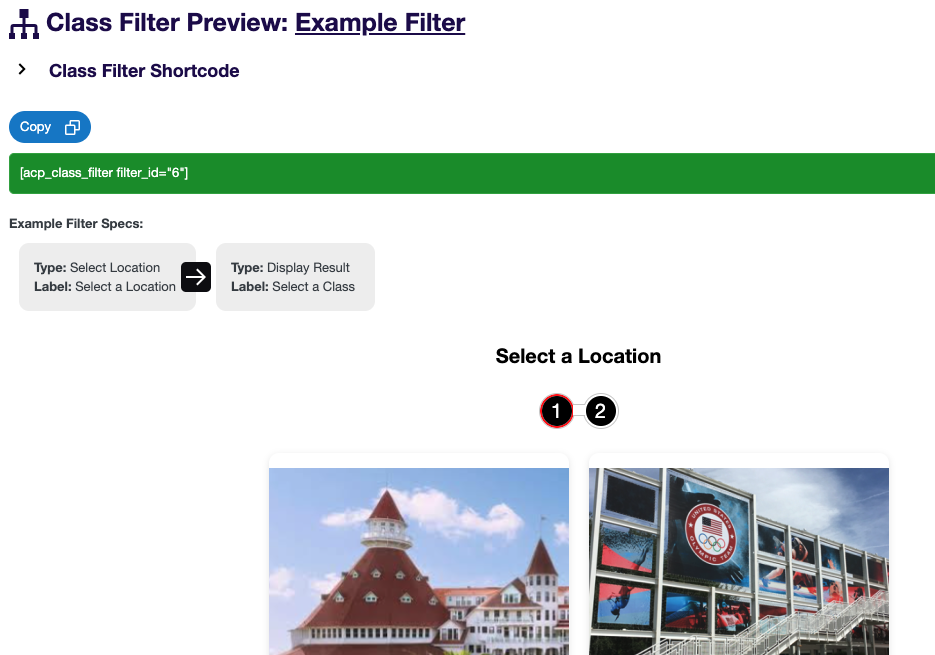
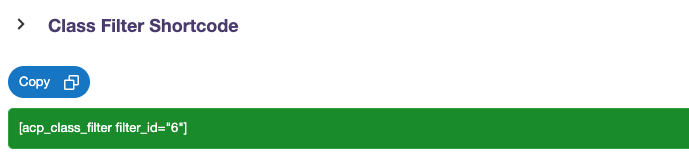
- Copy the Shortcode. On the preview screen copy the shortcode. Then add it into your website wherever you like.
Hot Diggity Dog, PHEWWW. You did it!!


Got somethin' to say?